27 Oct 2014
Here are some more of the projects I've been working on as I venture into the world of glass fusing.
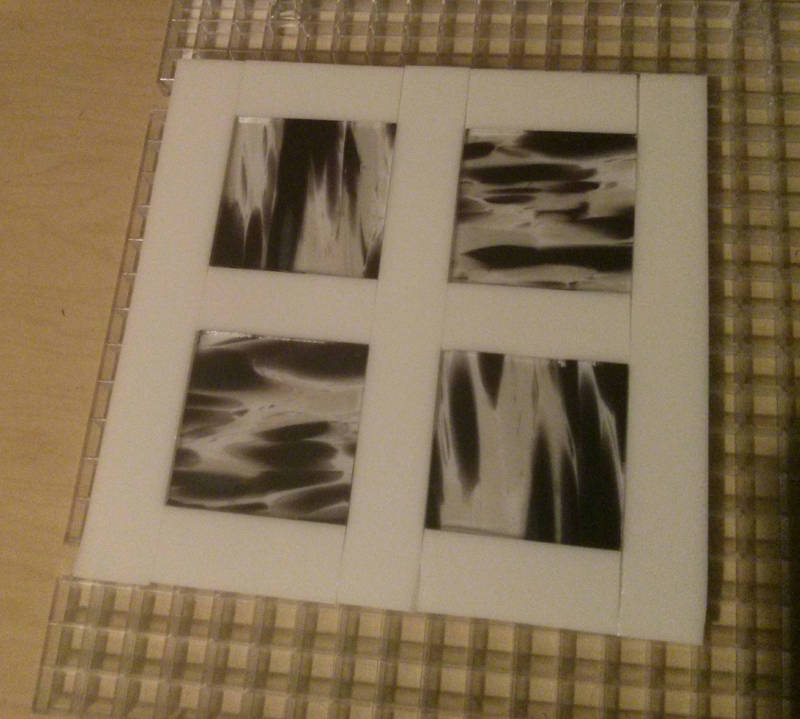
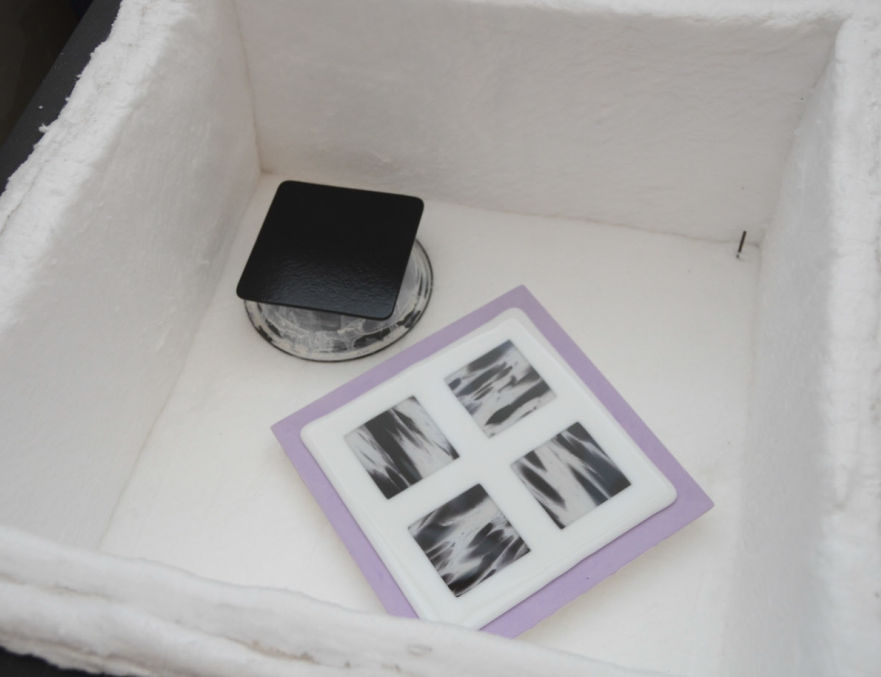
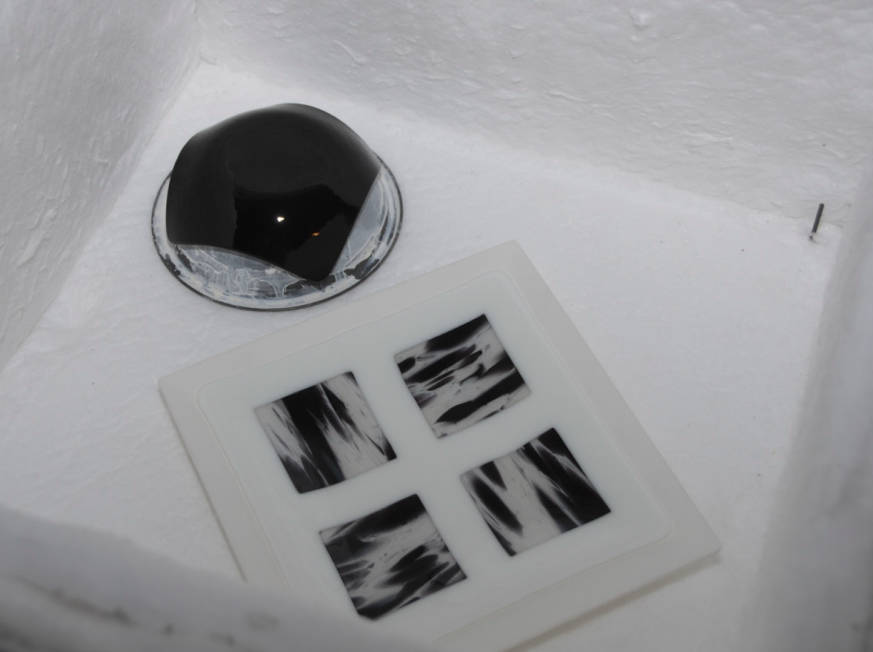
My idea for this first one was to use some white/black spirit glass and create windows that would have some shadow effects. The shadow effects didn't work out, but I still like the look of it.
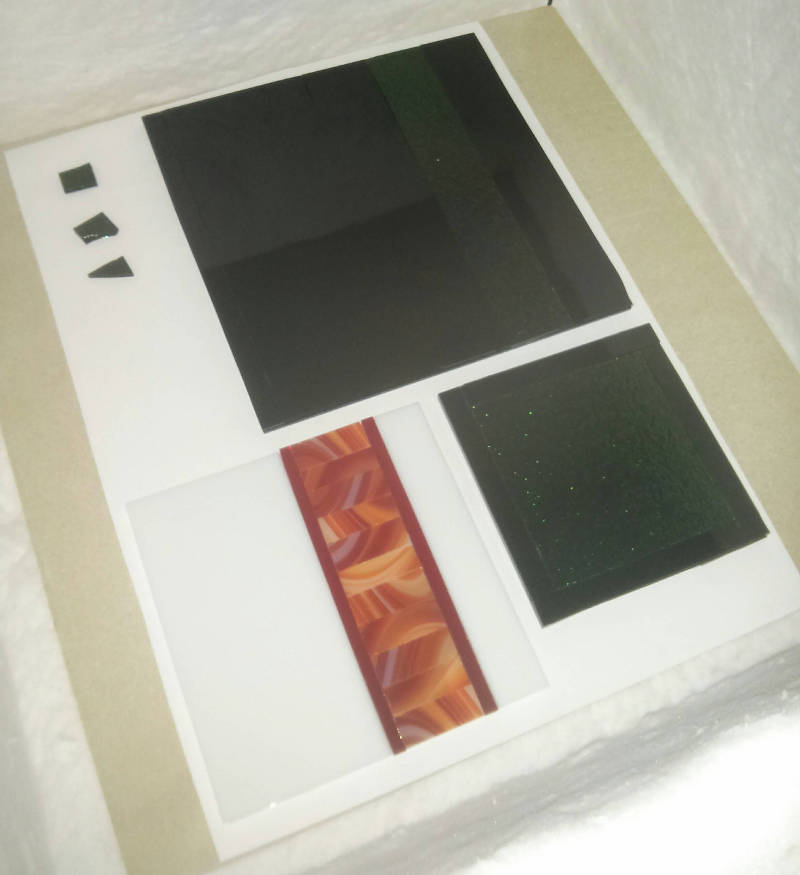
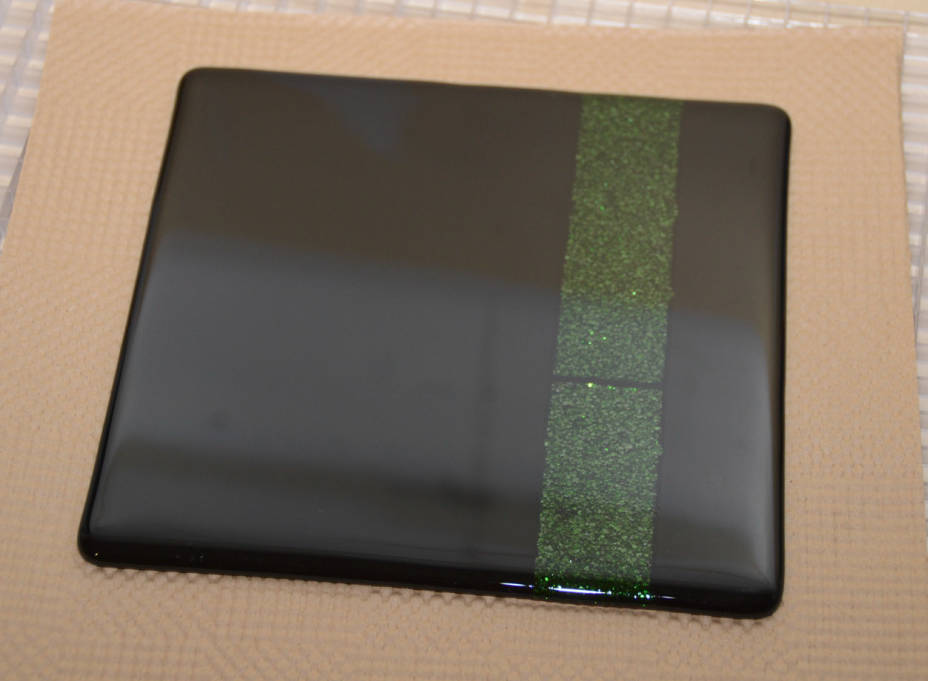
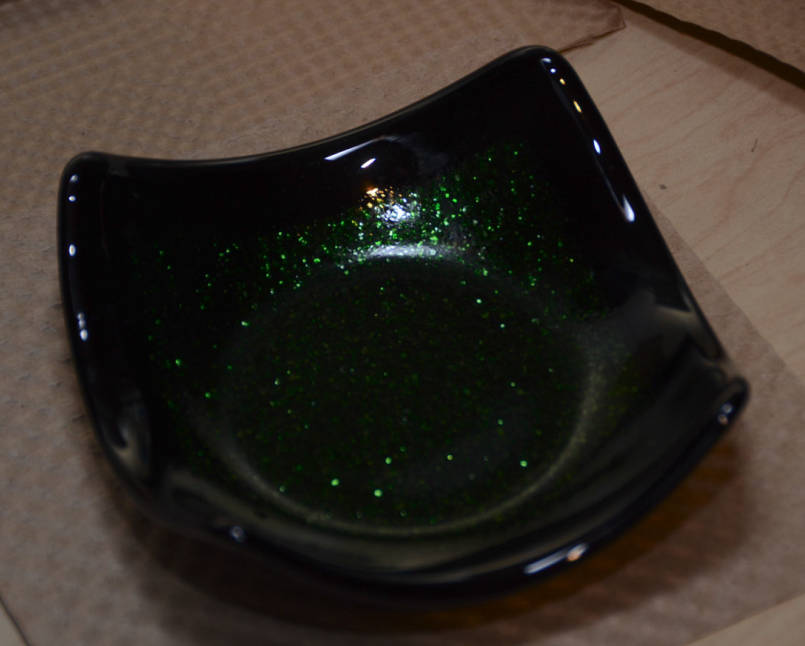
Adventurine is a beautiful dark green glass that shimmers and sparkles in the light. Pictures do not do it justice at all. I bought some green adventurine and wanted to make some pieces with it next to black. I'm making a large black plate with a stripe, and a smaller black shallow bowl with a green center.
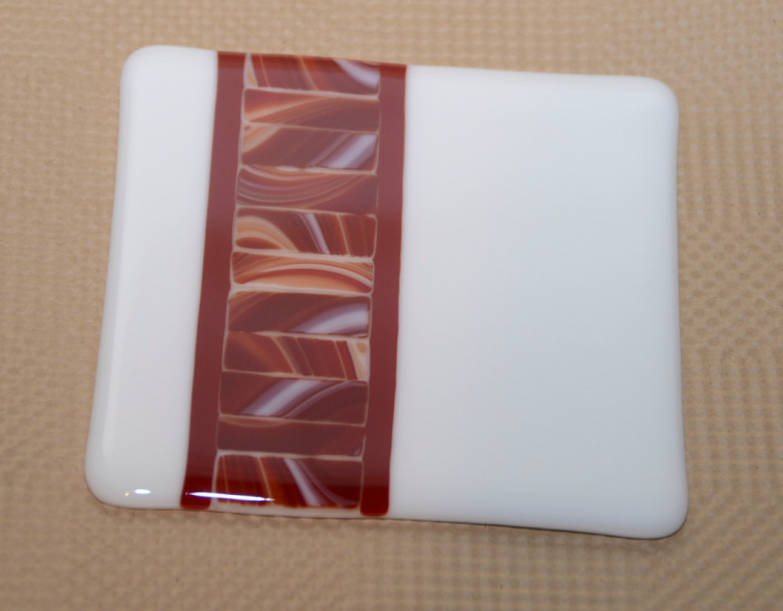
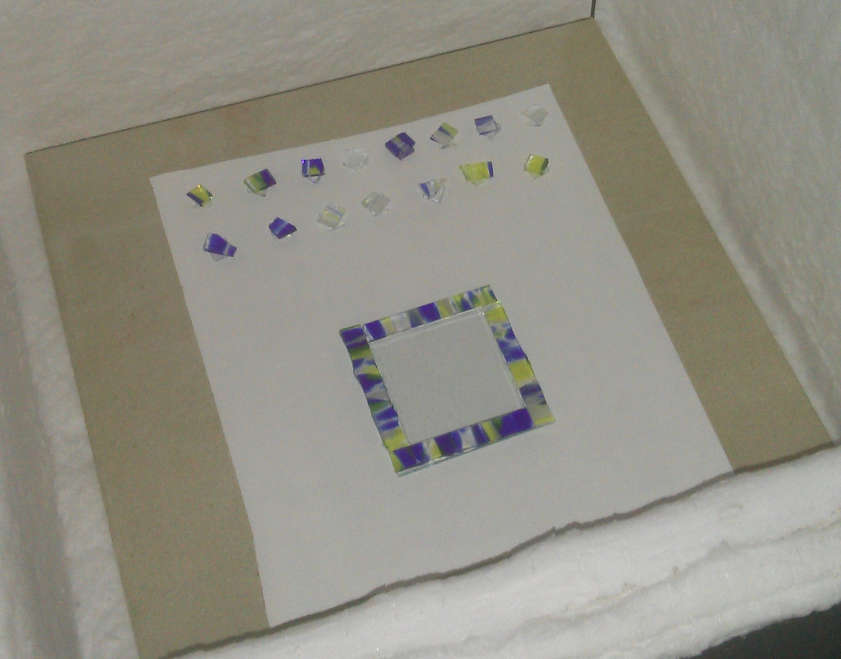
Lastly, I cut up some swirly red/white/orange glass into little blocks and lined them up on a white base. Not sure what it's going to be yet.
Originally, when I was cutting the green stripe a bad break left the piece too short, so I just put another piece in. My thinking was that the pieces would just fuse together and you wouldn't be able to tell. Unfortunately, when it came out there was a black line between the pieces. I think that the black glass melted at a lower temperature, so it flowed into the space between the green pieces before they had a chance to melt together. I'll have to keep in mind that different glasses melt and flow differently. It doesn't look too bad, but it's a lesson learned.
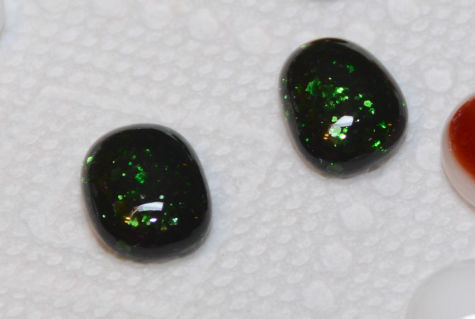
As a bonus of the bad break, I had some small scraps that I put on the kiln shelf (You can see them two pictures up). The little gems that came out look fantastic! This definitely has potential for jewelry or adding flair to other projects.
The smaller piece with a green square turned out great. Seriously, pictures do not do this glass justice.

The red swirls didn't come out as crisp as I would have liked, but it still looks good.
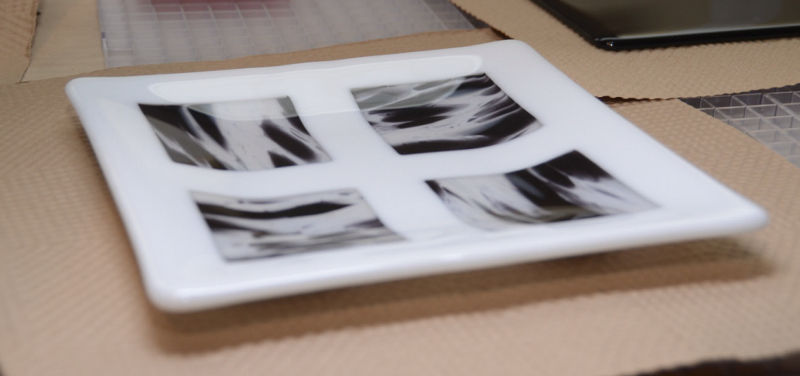
Getting ready to drape the green piece onto a bowl mold as well as slump the window piece into a plate mold.
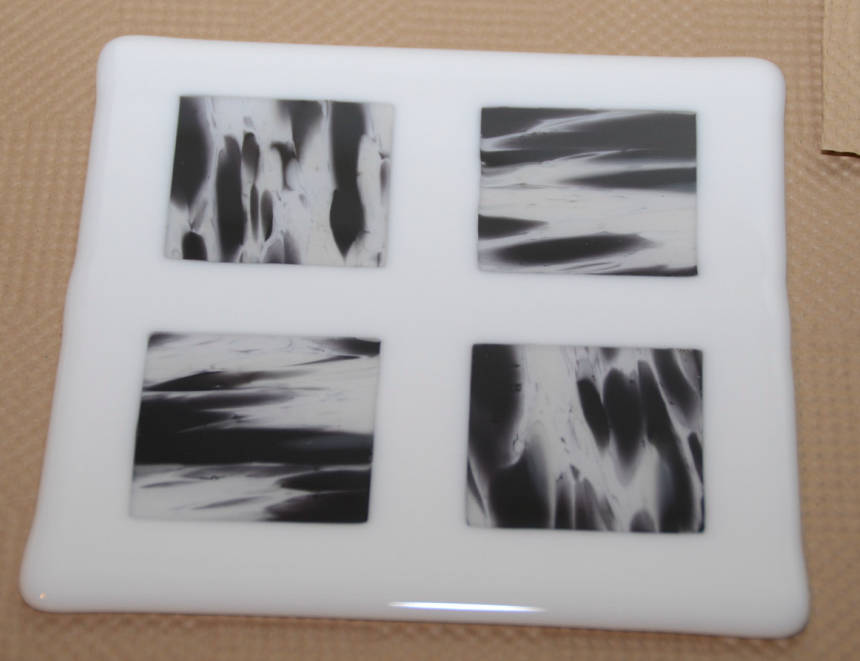
And here they are - many hours later - after being slumped!
The "window" plate came out well! It's about 8 inches square with a gentle slope on it.
However, the real beauty here was the bowl. I can not say enough about how pretty the adventurine is. This bowl is just under 5 inches across, which feels like a really good size. One thing I noticed though is that the mold left a bit of a rough texture in a couple places on the inside of this piece. Perhaps my slumping temperature was too high. I'll have to research to determine how to avoid that.
26 Oct 2014
I don't actually know what to call this. It's not really a plate... it's about 4 inches and has gently sloped sides so it doesn't hold very much. But it was the first thing I made in my kiln!
Originally, I didn't buy very much glass, I told myself that I had to actually make something before I could justify spending a bunch of money on glass. Also when I bought my first glass I had no idea what I was doing and everything I got was transparent.
I started with a clear base. On top are blue/yellow spirit glass borders with a clear square in the middle. I also cut up some of the scraps and made them into little squares that will turn into gems in the kiln due to the surface tension of glass.
Here is a peek into the kiln when I crash cooled it. (After the glass finishes the fusing at 1460 degrees F, you can bring it down to 1000 quicker than the kiln cools down on it's own. Then the controller takes back over and slowly cools the glass to allow it to relieve stress.)
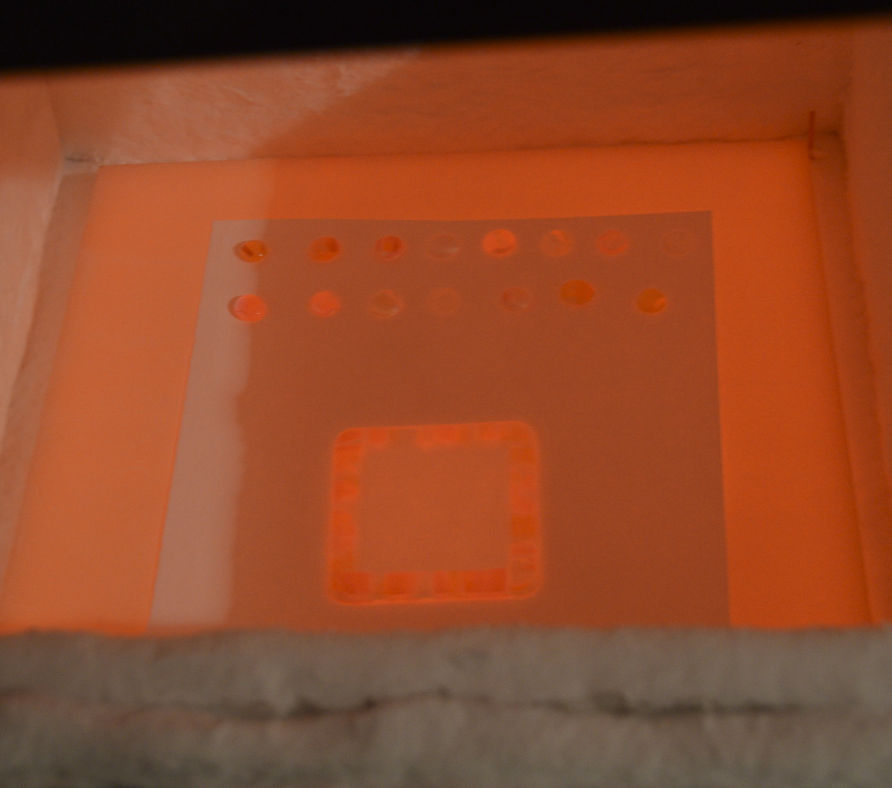
Everything inside the kiln is glowing red hot. You can see that the squares have become little glowing circles.
This is after they were done firing. You can see bubbles in the middle of the square. I'll have to research and test more to figure out how to reduce/eliminate them.
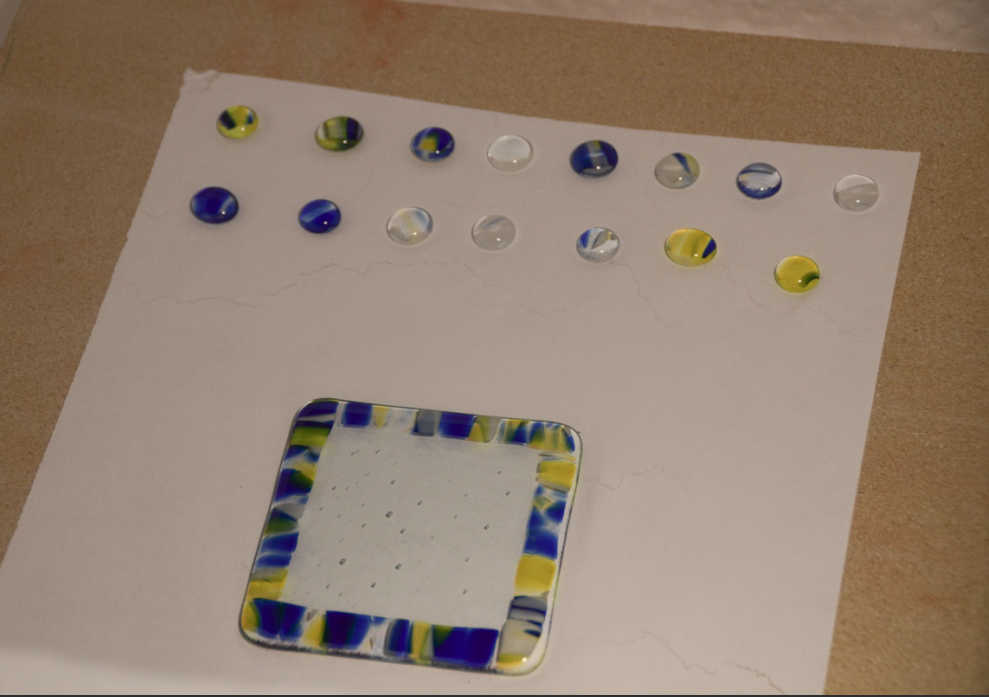
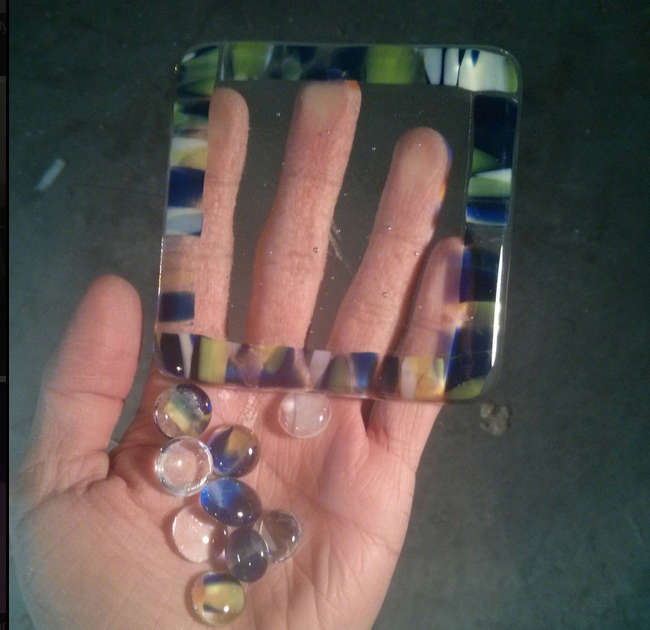
And here are the pieces once they were out of the kiln and cleaned up.
Next it was time to slump (actually drape in this case) the piece onto a mold. This mold is a cheap stainless steel mixing bowl I got at Winco that is coated in kiln wash to prevent the glass from sticking to it. I had to heat the bowl up to about 500 degrees and paint the kiln wash onto it while it was hot in order to get it to stick. Kiln wash has the consistency of milk, and evaporated/dried instantly upon being brushed onto the very hot bowl. It was a pretty fascinating process.
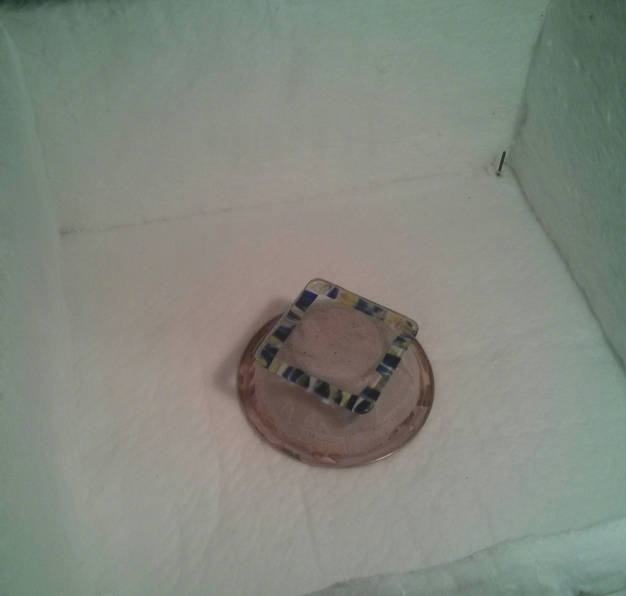
After another several hours in the kiln, here is the finished product:

25 Oct 2014
I decided to get into glass blowing, but that's a story for another day. This blog post is about the process I used for building my own kiln for glass fusing.
Glass blowing requires a fairly extensive set of tools, some of which are rather expensive. I want to build the parts I can, partially to save money, but mostly because I really enjoy learning enough about something to make it myself.
A crucial piece of equipment in glass blowing is the annealing kiln. It slowly brings the hot glass down to room temperature relieving stress and preventing it from breaking or being very fragile. Without it, you can't keep any of the glass pieces you make. So that was the first thing I was going to build. As I researched it, I realized if I made it so that it could go a bit hotter than I could also do glass fusing. Fusing requires temperatures close to 1500° F, whereas annealing is around 1000° F. My plan is to build a fusing kiln and play around with fusing for a while. Then later, it will be my annealing kiln when I build the rest of my tools.
I'd like to give a huge shout out to Miki Firth and his Hot Glass Bits site. My kiln design is basically a clone of what he describes here. Also, thanks to Dudley Giberson and his hugely informative Element Paper, as well as his help when I had questions.
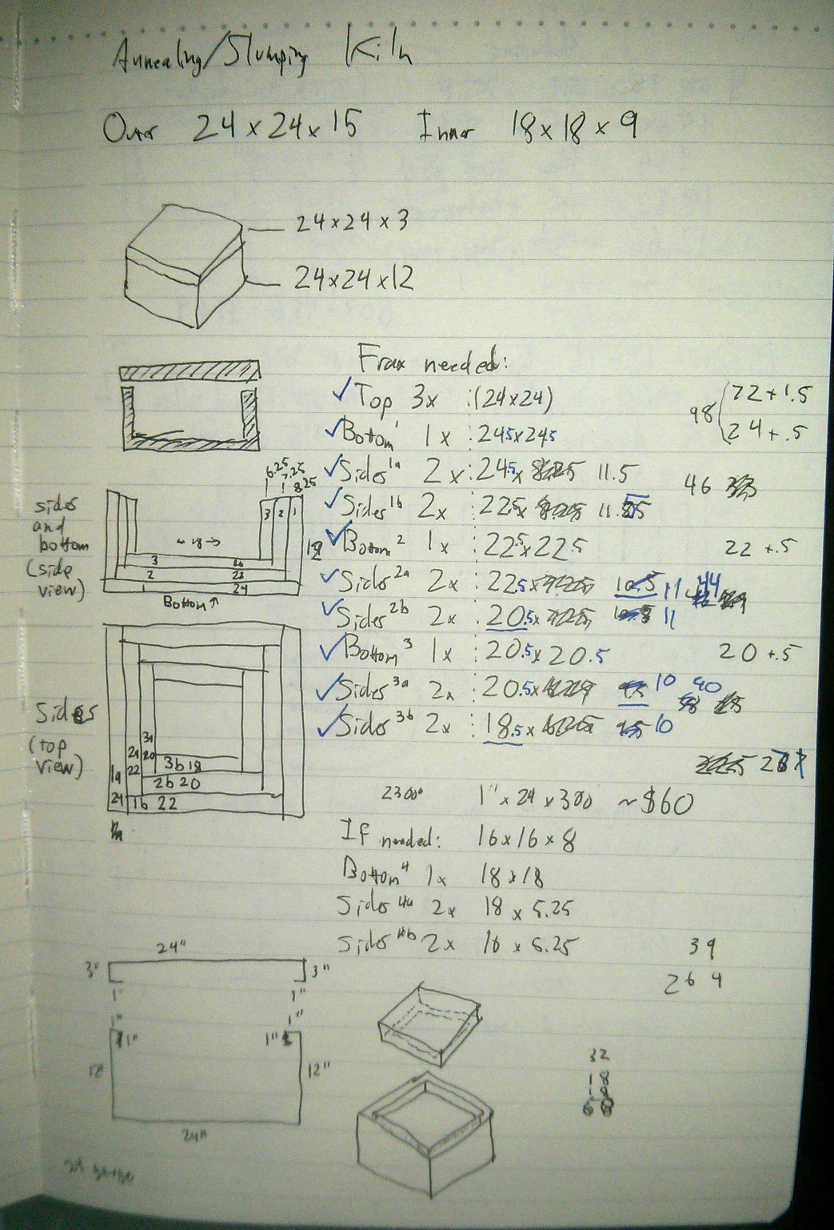
Sizing things out
I wanted the biggest kiln I could, but I had pretty strict power limits. (In hind-sight, bigger is not always better). I'm renting, so it wouldn't be cost effective to pay for a 220 Volt line to the garage. I decided to stick to 120 Volt 15 Amp, since most garages have 15 or 20 Amps.
I decided on a 120 Volt, 12 Amp element that would produce 1440 watts. Based on my power limit, the temperature I wanted to reach, and the insulation I was planning on using, I estimated that could make my kiln around 1.5 cubic feet inside. I ended up with a design that was 18" x 18" x 9" on the inside, which was 1.69 cubic feet. I know that's bigger than my estimate, but I figured I could just add some extra insulation on the bottom, thus reducing the inside volume. (This ended up to not be the case, and I paid for it later. Also, always err on the side of having too much power compared to size, not having too little.)
If I were to buy a kiln of about the same size and power requirements, it would cost around $1200. So my goal was to come in below that by as much as possible. My initial estimates were that it would cost between $500 and $600.
Armed with this information, I began my quest:
Building the box
My plan was basically to build a sheet metal box on a metal frame, fill it 3 inches of ceramic fiber blanket. So the first thing on the menu was to build a box.
Sadly, I don't have many actual pictures of my early progress, but I do have some drawings and various calculations.
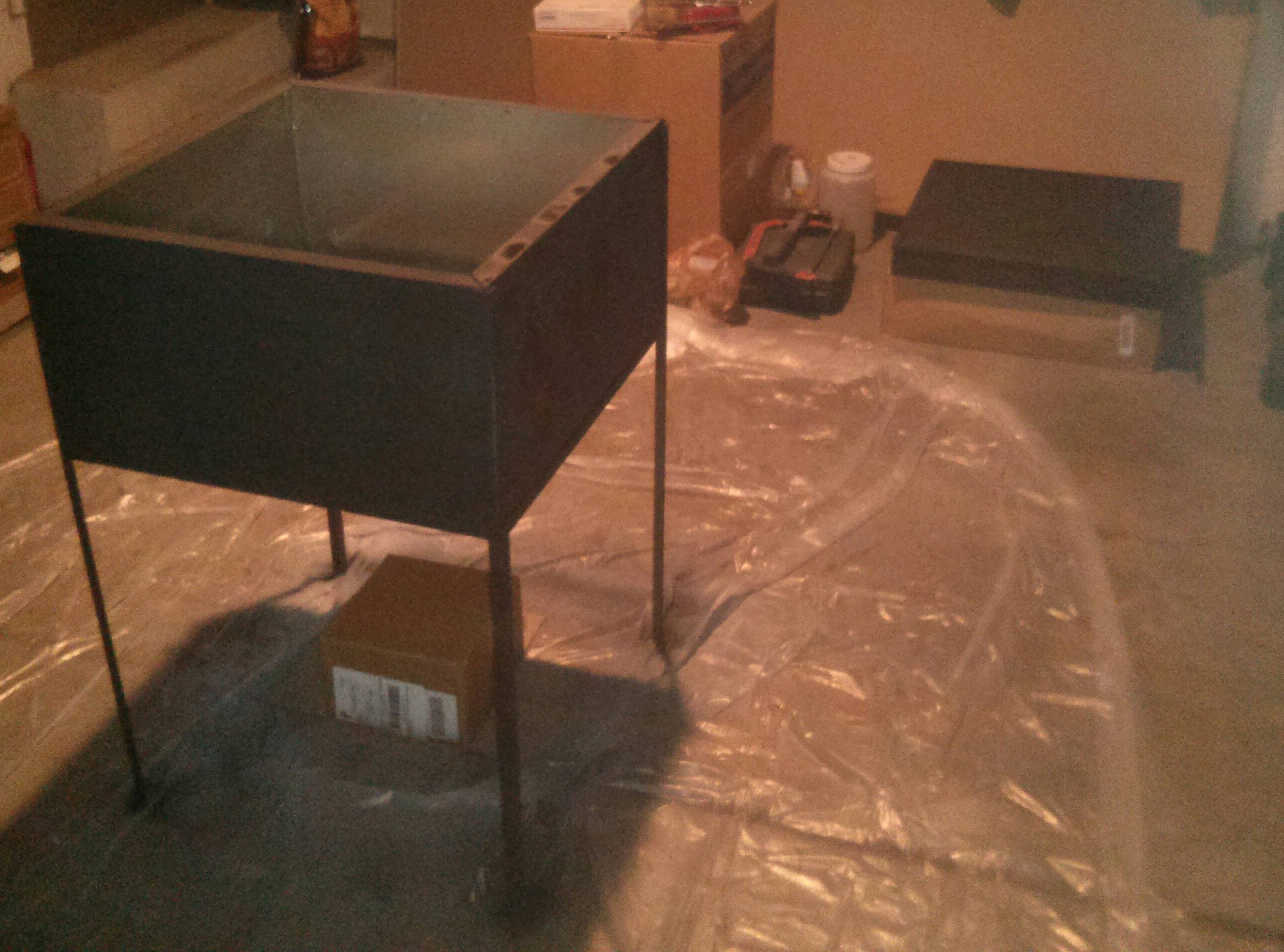
I estimated how much it would cost to buy the sheet metal and a metal brake but it was looking pretty expensive. I called a few air conditioning shops, as Mike Firth suggested and struck figurative gold. Professional Heating and Air in Pleasant Grove fabricated me a lovely metal box for $21. I honestly have no idea how they did it for so cheap, it would have cost me more just the buy the sheet metal.
Next a friend's father helped my cut up and weld the frame together. Sadly, I don't have any pictures of this part of the process. Huge thank you to Jim for helping me. Couldn't have done it without his help!
At this point, I spray painted the metal with a high-temp black paint typically used for bbq grills to make it look a little nicer, and installed the hinge.
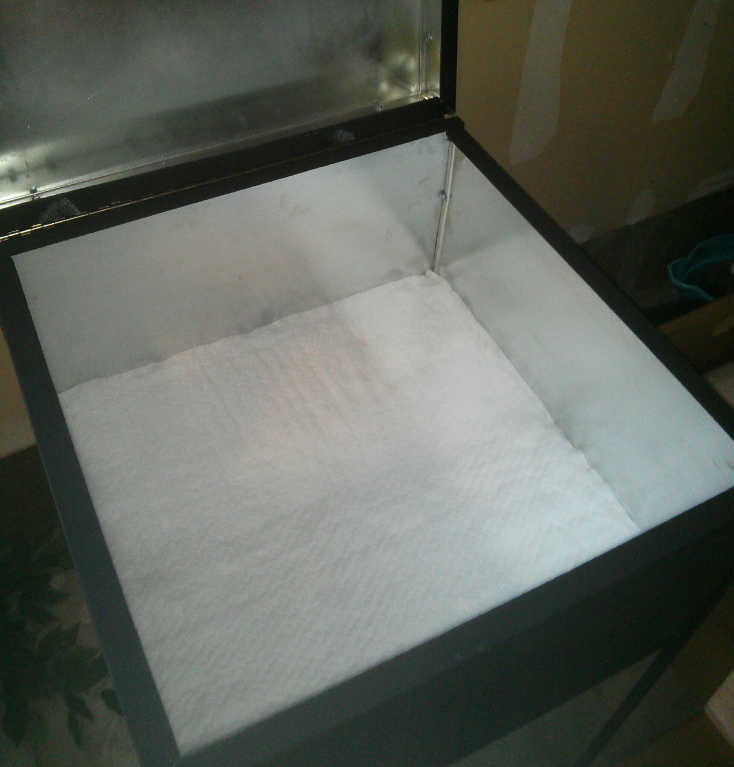
Now it was time to start cutting up and installing the insulation. I bought a 2 feet by 25 feet roll of 1 inch thick ceramic fiber blanket from Mountain View Pro Logistics in Salt Lake. In the schematics picture above, you can see all the sizes of the pieces I needed to cut, and how they fit together to make the three layers of insulation.

I used a long ruler and a box cutter to slice the insulation to the right size. I wore gloves and a breathing mask when working with the insulation. I used Sodium Silicate to glue the pieces together. I bought a whole gallon but only ended up using about a cup. Here is the first piece of insulation put into place:
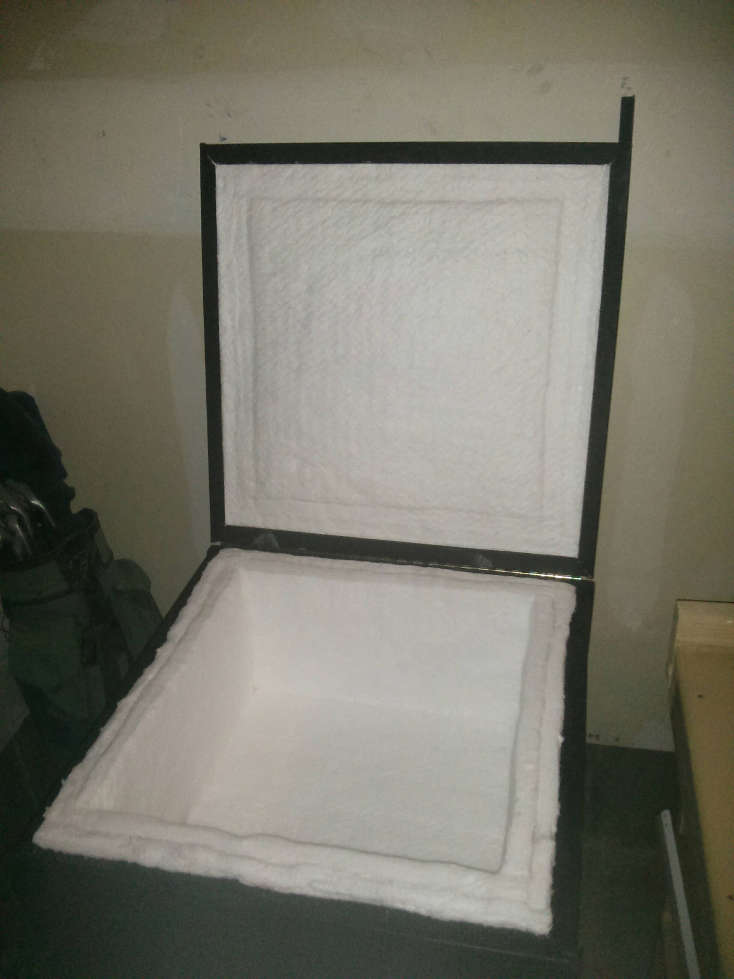
And all the pieces in place. I intentially made the inner 2 layers of the bottom too tall, so that they press up against the insulation in the top to make a tighter seal.
Cost for box, frame, and insulation:
- $21 - Sheet metal box from Professional Heating and Air
- $50 - Angle iron for frame
- $15 - Piano Hinge
- $10 - Various screws
- $10 - 2 cans of high temp spray paint
- $71 - Ceramic Fiber Blanket Insulation
- $13 - Sodium Silicate (glue for holding insulation)
- $30 - Two 16" x 16" kiln shelves
Total $220
Building the controller
I was still waiting for the element to arrive, so I got to work building the controller.
The basic idea of the controller is that it monitors the kiln temperature and what you want the temperature to be, and turns on and off the element as needed. The controller can be programmed to follow a schedule of "ramps" and "soaks", which is crucial for fusing glass. This controller provides control of the element via a Solid State Relay. Basically, the controller provides a small (12 V) signal to the relay, and the relay provides the higher (120 V) power to the element.
In the following schematic, my original intention was to have the box vertical, for potentially mointing on the side of the kiln. I eventually decided against that, and made the box horizontal, as well as making it larger. The original 2" x 4" was wildly too small.
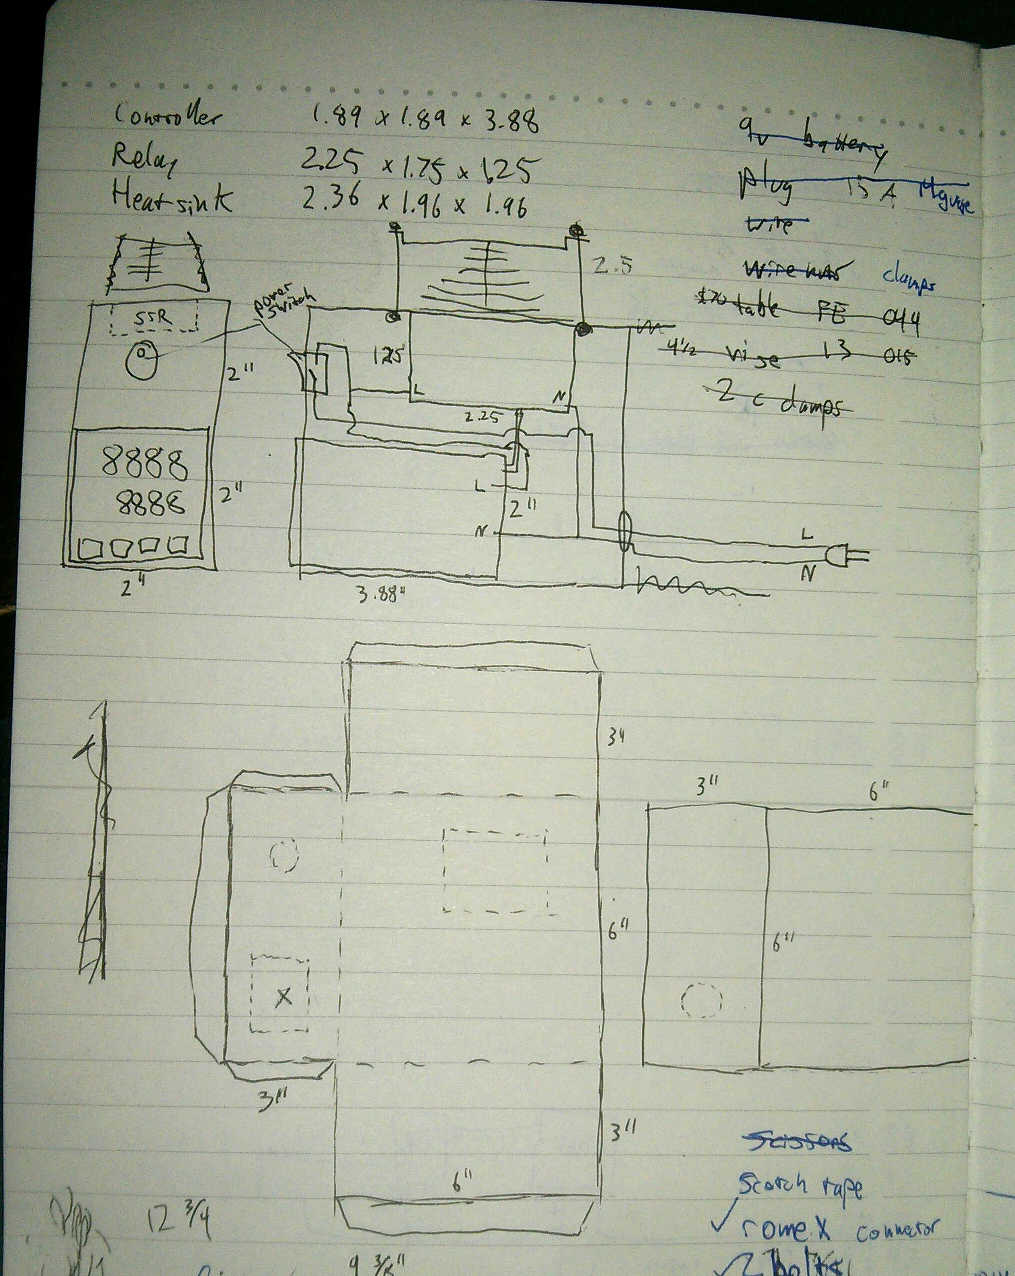
I cut the sheet metal and bent it using scraps of wood and some C clamps (I really wish I had taken pictures of this process, it was rather clever but painfully slow). Then I got to work installing the pieces where they went. Here it is with everything in place, about to be closed up.
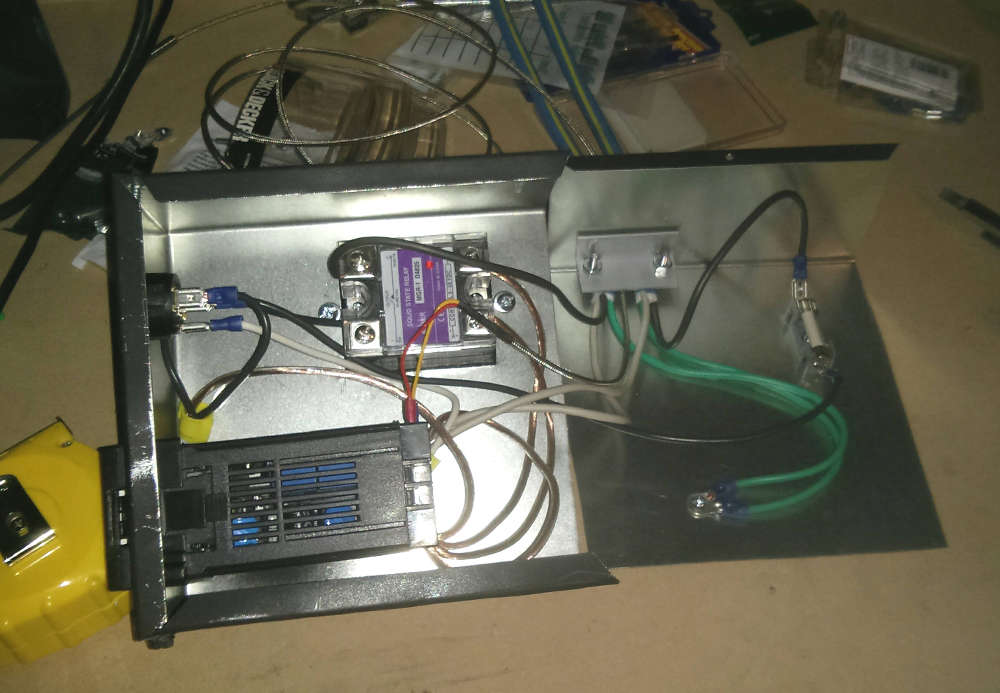
And closed up and ready to go. The red number is what the thermocouple (which is the metal rod on the left side) is reading, and 45 (I just picked a random number) is what the controller is set to.

Total cost for controller box:
- $79 - Auber SYL-2352P controller
- $19 - Auber K thermocouple
- $15 - Auber 15 Amp SSR relay
- $10 - Auber Heat Sink for SSR
- $13 - Shipping for Auber stuff
- $20 - Sheet metal to make the controller housing
- $20 - Extension cord
- $15 - 15A fuse and holder
- $15 - Wires, wirenuts, bolts, etc.
- $5 - Rocker switch
Total $211
Installing the element
When the package from Joppa Glassworks arrived I was very excited! I finally had the last pieces for the kiln! I think I stayed up until about 2am that night installing the element.
The element comes as a tightly wound coil, like a spring. There were ceramic rods that go through the coil, donuts that hold it in place, and some ceramic tubes for where the element goes through the insulation and metal shell. The coil of wire by the donuts will be cut into pieces to hold the donuts to the shell to keep the element in place.

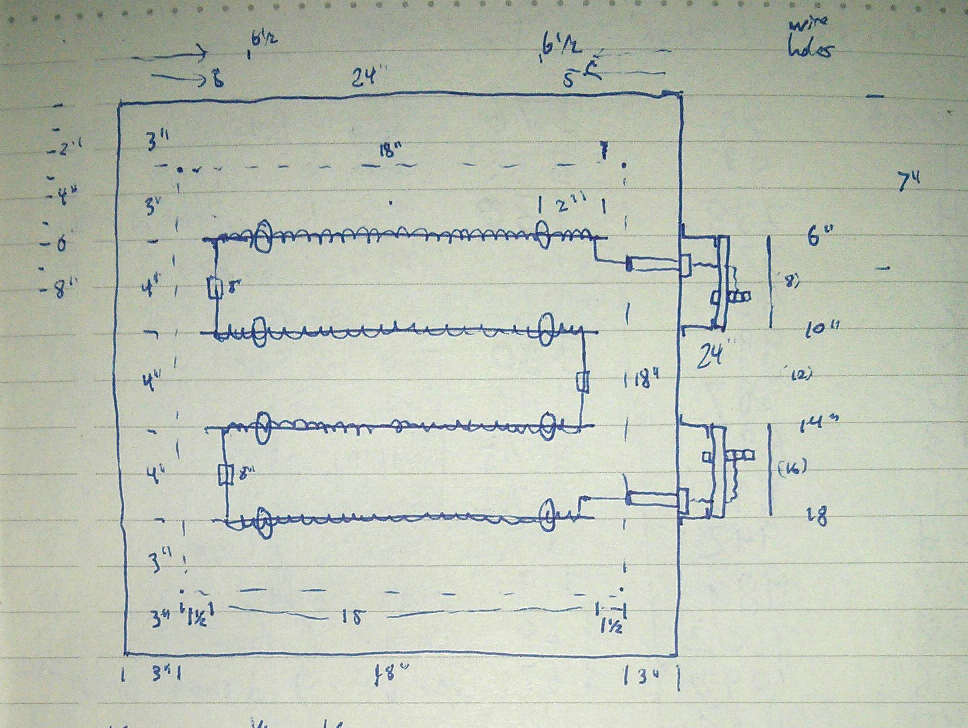
I had planned out how the element was going to be installed in the ceiling of the kiln:
So the first step was to stretch and bend the element into the right lengths and shape. This picture shows about halfway through that process.
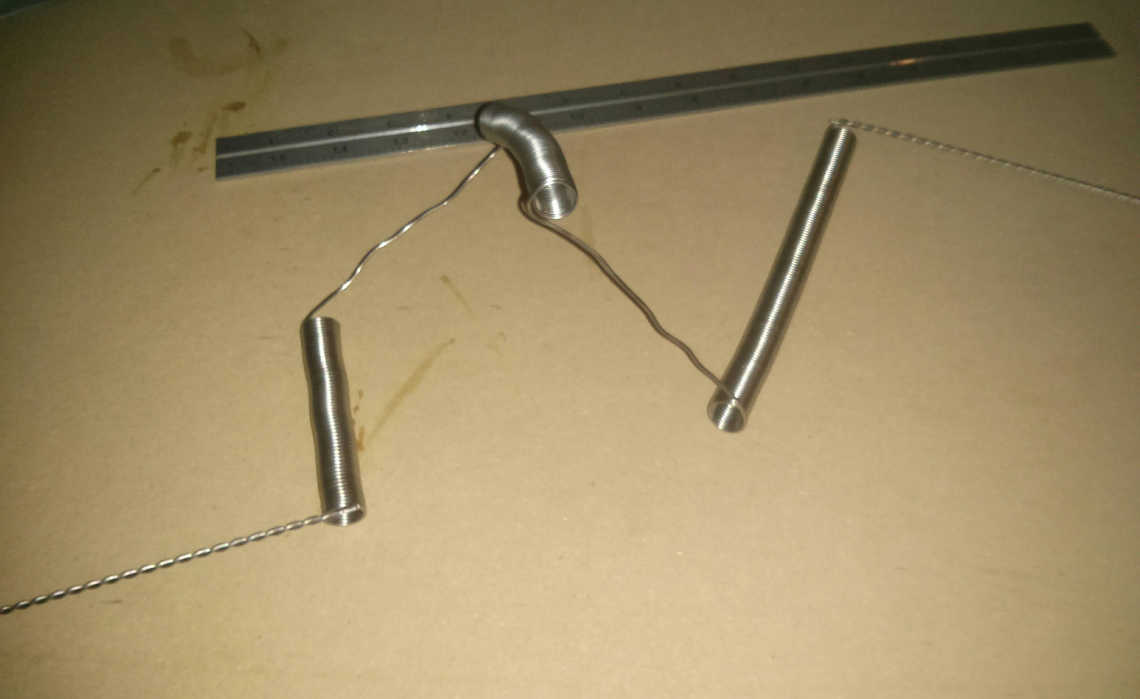
After they were stretched I put them on the ceramic rods and it was time to install it!
Installing it was pretty frustrating. I drilled holes in the top of the lid for the wire to come through, then threaded the wire through the hole and poked through the insulation. Then I wrapped it around the donut and twisted it tight. Then repeated this about 12 times. Once all the wires are though, they are pulled tight and screwed to the lid to hold the element firmly in place.
Finally, I had to connect the power to the element. The element tends to get hot - imagine that - which isn't generally good for wires. The junction between the hot element and cold wires tends to be a failing point, so I connected the two using a connection board as described by Dudley Giberson in his excellent Element Paper. Here is the power from the controller connected to the element. Note: the connections are not covered yet or the wires secured, but rest assured this will be finished up and made safer soon.
With everything connected up, it was time to fire up the kiln! To my dismay, it only reached 1380, instead of the needed 1460. I was really pushing it with the very zealous size of my kiln, especially with the limited power I had. I emailed Joppa glass and placed another order for a new element that was 14 amps so now I'll have 1680 watts instead of 1440. Sadly, this meant waiting for a couple days for the package, then going through the painful process of installing the element again.
But in the end, I was rewarded with a kiln that can reach fusing temperatures!
First order from Joppa Glass:
- $26 - Heating element
- $8 - Marinite connection boards
- $9 - Wire keepers
- $14 - Ceramic Donuts
- $26 - Ceramic support rods
- $12 - Ceramic Tubes
- $5 - High Temp Wire
- $15 - Shipping
Total $115
Second order from Joppa Glass:
- $32 - Heating element
- $5 - High Temp Wire
- $15 - Shipping
Total $52
So, if I had gotten the bigger element it would have cost me $6 more. Instead it cost me $52 more plus a lot more time.
The total cost was $598. I spent many many hours working on the kiln, plus had to buy some tools that I didn't have yet. I don't know if it really saved me money, but it was definitely a fun adventure.
Final thoughts
If I did this again, I would definitely either make the kiln smaller or have more power. With the power I have, I'm cutting it really close. As it is, it takes quite a while to get up to fusing temperature. As the element ages it may not even get there anymore. Perhaps it would have helped if I had added 1 more layer of insulation everywhere, or at least on the top. The element is held firmly against the insulation at the top, so the top of the box tends to get the hottest.
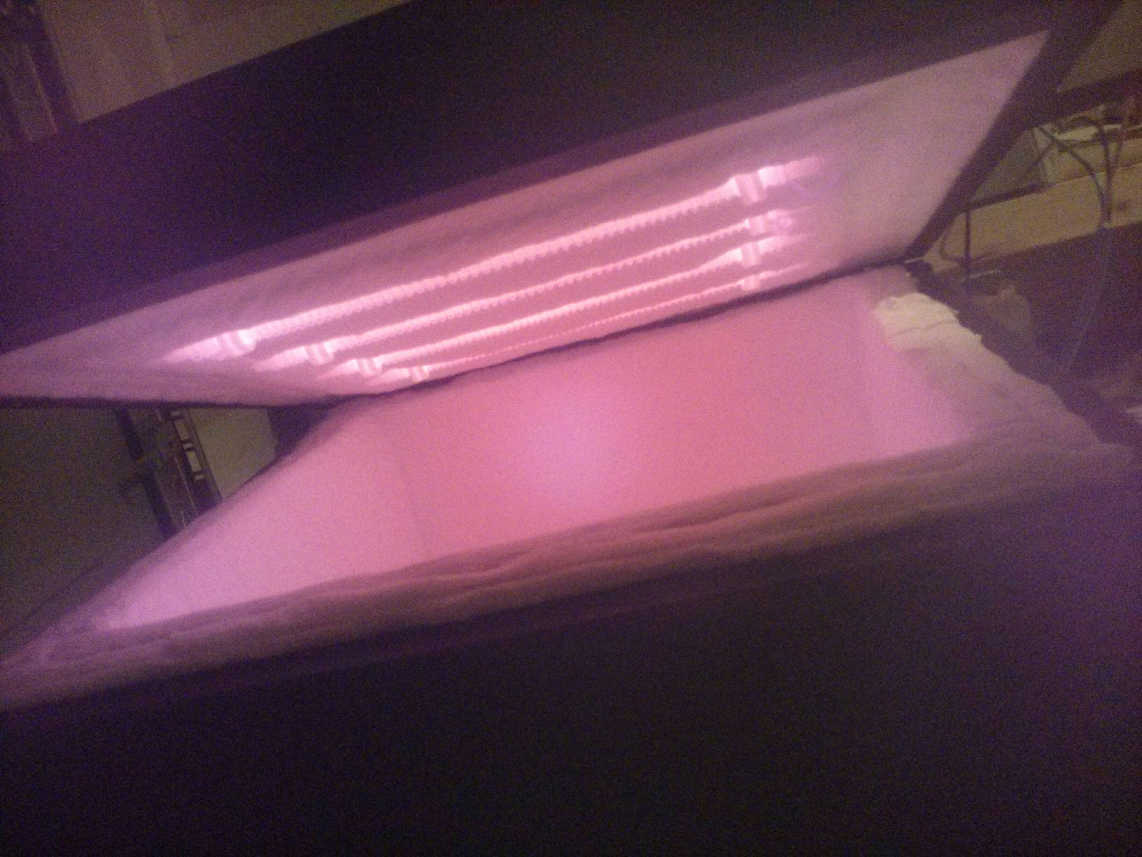
And this post is already massive, so here is one last picture, of a peek into the hot kiln: